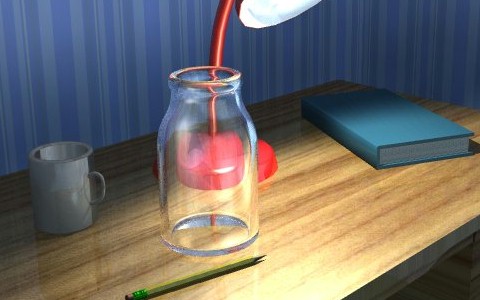
Refractive Glass Things
|
How can I make realistic glass in LightWave? Refraction in Lightwave - To make realistic refractive objects, you have to understand how Lightwave handles refraction. As a light ray bounces around in your scene, Lightwave keeps track of the refractive index of the medium that the ray is currently in. The ray starts out in air, with a refractive index of 1. Every time it hits a transparent polygon, it is bent according to the ratio of the current index to the new index by Snell's Law. The current index is set to the new index and the ray keeps going. Refraction in "Real Life" - Now let's think about what happens in "real life". A light ray starts out in air (index = 1) and hits, say, a glass ball (index = 1.52). This bends the ray. Then it travels through the glass to the other side, back out into air (index = 1). This bends the ray again. So, to simulate this in Lightwave, a light ray needs to hit polygons going in (glass) and polygons going out (air). In other words, we need glass polygons facing out, and air polygons facing in.
Building the Thing - Fire up Modeler and build yourself a simple object. Make a bowl or a sphere or something. Apply a surface to it called "Glass". Make sure that you make a nice, solid, 3D object with no holes or self-intersections. Otherwise, the raytracer can get confused. Remember, the object is going to be transparent, so any garbage polygons on the inside of the object will be visible!
Then triple the polygons. Tripling the polygons avoids nasty raytracing artifacts that may arise if your object has any non-planar polygons. These artifacts usually show up as "holes" in the shadow of the object.
There. We have the Glass polys. Now we need the Air polys. Luckily, this is simple. Copy your object onto another layer. Flip the polygons, and apply a surface called "Air". Now cut and paste this layer back onto the original layer. Merge points if you like. Surfacing the Thing - Here's a typical glass surface and air surface, correctly set up for Lightwave:
Note that the Air surface needs to be exactly the same shape as the Glass, including the Smoothing setting and any bump maps. And, since the Air is flipped, its bump maps should have negative amplitudes compared to the Glass bump maps. Perfectly matching the shape of each transparent surface may require more than one Air surface. However, you can often get away with ignoring the bump maps, and just having one Air surface with Smoothing turned on called "AirSmooth", and one with Smoothing turned off called "AirFlat". Keep this in mind when modelling!
Render the Thing - Load your model into Layout and set up the surfaces to match the above table. Also load up some props so your object has something to refract. Just grab a bunch of stuff from the Objects directory and set up a happy still life. A few apples, a baseball cap and a pair of sunglasses sitting on a table should complement your object nicely. Put a nice gradient in the background. Add some nice lights. For some excellent tips on lighting by Andrew Weiler, visit here. Another excellent lighting tutorial, by Amaan Akram, is here.
Turn on Trace Shadows, Trace Reflections and Trace Refractions. Then WHAM! Hit Render. - GLYPH |
